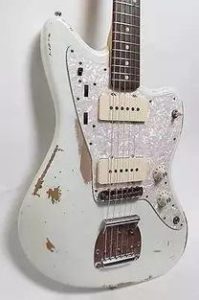
Wiring a Tone Pot: A Comprehensive Guide
Understanding the role of a tone pot in guitar electronics is crucial for any musician looking to customize their sound. A tone pot, also known as a volume pot, is a potentiometer that controls the volume of an electric guitar’s pickups. In this guide, we’ll delve into the intricacies of wiring a tone pot, ensuring you have the knowledge to tackle this task with confidence.
What is a Tone Pot?
A tone pot is a type of potentiometer that adjusts the frequency response of a guitar’s pickups. It’s often used in conjunction with a capacitor to create a tone control circuit. This circuit allows you to roll off the high frequencies (treble) or low frequencies (bass) of your guitar’s sound, giving you more control over your tone.
Types of Tone Pots
There are several types of tone pots available, each with its own unique features:
| Type | Description |
|---|---|
| Linear | Changes volume in a linear fashion, with equal changes in volume at all frequencies. |
| Audio taper | Changes volume in a logarithmic fashion, with more significant changes in volume at higher frequencies. |
| Logarithmic | Changes volume in a logarithmic fashion, with more significant changes in volume at lower frequencies. |
When choosing a tone pot, consider the type of sound you’re looking to achieve. Audio taper pots are the most common, as they provide a natural volume response that’s similar to the human ear’s perception of volume.
Wiring a Tone Pot

Wiring a tone pot involves connecting it to your guitar’s pickups, capacitor, and potentiometer. Here’s a step-by-step guide to help you through the process:
- Remove the back plate of your guitar to access the electronics.
- Locate the pickup wires and identify the hot (signal) and ground (return) wires.
- Strip the insulation from the pickup wires, leaving about 1/4 inch of bare wire.
- Connect the hot wire from the pickup to the center terminal of the tone pot.
- Connect the ground wire from the pickup to the outer terminal of the tone pot.
- Connect the capacitor to the tone pot. The capacitor should be connected between the outer terminal of the tone pot and the ground wire.
- Connect the potentiometer to the tone pot. The potentiometer should be connected between the center terminal of the tone pot and the ground wire.
- Reassemble the guitar and test the tone pot to ensure it’s working correctly.
Common Issues and Solutions
When wiring a tone pot, you may encounter a few common issues. Here are some solutions to help you troubleshoot:
- No sound: Check that all connections are secure and that the pickup wires are not damaged.
- Scratchy sound: Ensure that the potentiometer is clean and free of dust or debris.
- Unwanted noise: Check for loose connections or a faulty capacitor.
Conclusion
Wiring a tone pot is a valuable skill for any guitar enthusiast. By understanding the basics of tone pots and how to wire them, you can customize your guitar’s sound and explore new tonal possibilities. With this guide, you’re well on your way to mastering the art of tone pot wiring.