Photoshop Desaturate Image Without Affecting Skin Tone: A Detailed Guide
Desaturation in Photoshop is a common technique used to remove color from an image, often to create a black and white effect. However, when dealing with portraits, especially those featuring human skin, it’s crucial to preserve the natural tones of the skin. This guide will walk you through the process of desaturating an image in Photoshop while ensuring that the skin tone remains unaffected.
Understanding Skin Tone
Before diving into the desaturation process, it’s important to understand the concept of skin tone. Skin tone refers to the natural color of human skin, which can vary widely based on factors such as ethnicity, age, and lighting conditions. Preserving the skin tone during desaturation is essential to maintain the authenticity and realism of the image.
Step-by-Step Guide to Desaturate Image Without Affecting Skin Tone

Follow these steps to desaturate an image in Photoshop while preserving the skin tone:
- Open the image in Photoshop.
- Create a new layer on top of the original image by clicking on the “Layer” menu, selecting “New,” and then choosing “Layer.” Name this layer “Desaturation Layer.”
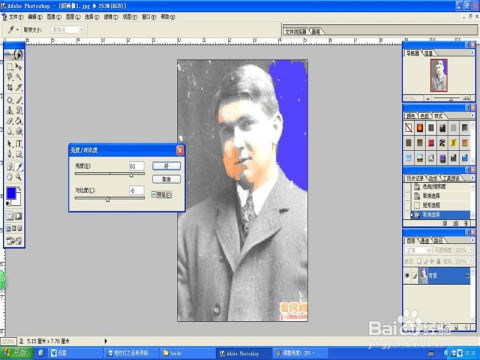
- With the “Desaturation Layer” selected, click on the “Adjustment” menu, select “Black & White,” and then click “OK.” This will convert the entire image to black and white.
- Adjust the “Black & White” adjustment layer’s properties to fine-tune the desaturation. The “Preserve Lightness” option can be useful for maintaining the overall brightness of the image.
- Click on the “Adjustment” menu again, select “Color Balance,” and then click “OK.” This will open the “Color Balance” dialog box.
- In the “Color Balance” dialog box, adjust the sliders for the “Midtones” and “Shadows” to enhance the skin tone. For example, you can increase the “Red” and “Yellow” sliders to warm up the skin tone.
- Click “OK” to apply the “Color Balance” adjustments.
- Adjust the opacity of the “Desaturation Layer” to control the intensity of the desaturation effect. A lower opacity will result in a more subtle effect, while a higher opacity will make the desaturation more pronounced.
- If necessary, create a new layer below the “Desaturation Layer” and use a soft brush to paint in color where you want to restore the original color, such as the eyes, lips, or any other areas that require attention.
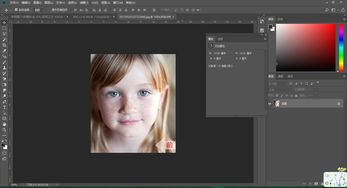
- Merge the layers if you’re satisfied with the result.
Additional Tips
Here are some additional tips to help you achieve the best results when desaturating an image without affecting the skin tone:
- Use a layer mask to protect the skin tone. Create a layer mask on the “Desaturation Layer” and use a soft brush to paint over the areas where you want to preserve the skin tone.
- Experiment with different blending modes for the “Desaturation Layer” to achieve various effects. For example, using the “Soft Light” or “Overlay” blending mode can add a subtle glow to the skin.
- Consider using the “Selective Color” adjustment to fine-tune the skin tone. This adjustment allows you to target specific colors and adjust their intensity.
Conclusion
Desaturating an image in Photoshop without affecting the skin tone can be a challenging task, but with the right techniques and tools, it’s certainly achievable. By following this guide and experimenting with the various adjustments available in Photoshop, you can create stunning black and white images that maintain the natural beauty of the subject’s skin.
| Step | Description |
|---|---|
| 1 | Open the image in Photoshop. |
| 2 | Create a new layer on top of the original image. |
| 3 | Convert the image to black and white using the “Black & White” adjustment. |
| 4 |