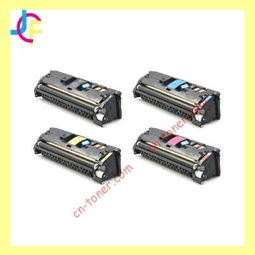
How to Replace the Toner Cartridge in a Brother Printer
Replacing the toner cartridge in your Brother printer is a task that most users will need to perform at some point. It’s a straightforward process, but it’s important to do it correctly to ensure the best print quality and to avoid any potential damage to your printer. In this guide, I’ll walk you through the steps to replace the toner cartridge in your Brother printer, ensuring a smooth and successful operation.
Before You Begin

Before you start the replacement process, there are a few things you should keep in mind:
- Always turn off your printer before replacing the toner cartridge.
- Make sure you have the correct toner cartridge for your printer model.
- Keep the toner cartridge in its original packaging until you’re ready to use it.
Now that you’re prepared, let’s move on to the actual steps.
Step 1: Open the Toner Cartridge Access Door

Locate the toner cartridge access door on the front or top of your printer. It’s usually marked with a symbol that resembles a toner cartridge. Gently pull the door open to reveal the toner cartridge.
Step 2: Remove the Old Toner Cartridge

Grasp the old toner cartridge by the handle or the sides and gently pull it out of the printer. Be careful not to touch the imaging drum, as this can cause print quality issues.
Once the old toner cartridge is out, dispose of it according to the manufacturer’s instructions. Some toner cartridges can be recycled, so check with your local recycling center for options.
Step 3: Remove the Toner Cartridge from Its Packaging
Remove the toner cartridge from its packaging, being careful not to shake it or expose it to light. The toner is sensitive to air and light, and exposure can cause it to dry out or clump.
Step 4: Insert the New Toner Cartridge
Hold the new toner cartridge with the toner side facing away from you. Insert it into the printer, aligning the cartridge with the guides in the printer. Push the cartridge firmly into place until it clicks into position.
Step 5: Close the Toner Cartridge Access Door
Once the new toner cartridge is securely in place, gently close the toner cartridge access door. Make sure it’s fully closed to prevent any toner from spilling out.
Step 6: Align the Print Cartridge
Some Brother printers require you to align the print cartridge after replacing the toner. To do this, follow these steps:
- Open the printer’s control panel.
- Go to the printer settings menu.
- Select “Align Print Cartridge” or a similar option.
- Follow the on-screen instructions to complete the alignment process.
Aligning the print cartridge ensures that the print quality is consistent and that the pages are properly centered.
Step 7: Test the Printer
After replacing the toner cartridge and aligning the print cartridge (if necessary), it’s a good idea to test the printer. Print a test page to ensure that the new toner cartridge is working correctly and that the print quality is as expected.
By following these steps, you should be able to replace the toner cartridge in your Brother printer without any issues. Remember to keep the printer’s manual handy for specific instructions related to your printer model.
Replacing the toner cartridge is a routine maintenance task that helps keep your printer running smoothly. By doing it yourself, you can save time and money, and you’ll have the satisfaction of knowing that you’ve taken care of your printer.