HP 200 Replace Toner Cartridges: A Comprehensive Guide
When it comes to maintaining your HP 200 printer, replacing the toner cartridges is a task that you’ll need to tackle periodically. This guide will walk you through the process of replacing toner cartridges for your HP 200 printer, ensuring that you can keep your printer running smoothly and efficiently.
Understanding Your HP 200 Toner Cartridges
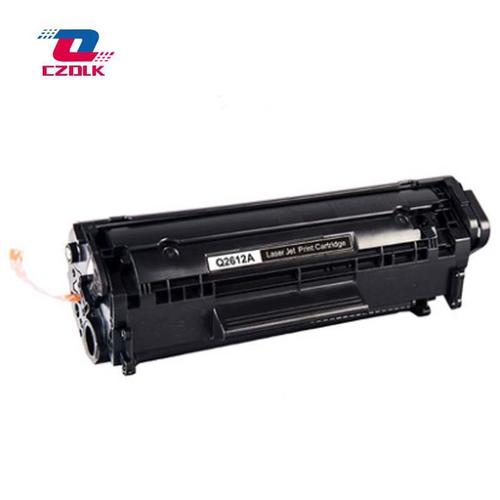
Your HP 200 printer uses specific toner cartridges that are designed to work with the printer’s technology. These cartridges come in two types: black and color. It’s important to use the correct type of toner cartridge for your printer to ensure optimal performance and print quality.
| Cartridge Type | Description |
|---|---|
| Black Toner Cartridge | Used for printing black text and images. It provides high-quality, sharp text and is suitable for documents that require professional appearance. |
| Color Toner Cartridge | Used for printing color text and images. It offers vibrant colors and is ideal for presentations, brochures, and other visually appealing documents. |
Before you proceed with replacing the toner cartridges, make sure you have the correct type for your printer. You can find this information in the printer’s manual or by checking the label on the existing toner cartridge.
Locating the Toner Cartridge
Accessing the toner cartridge in your HP 200 printer is a straightforward process. Follow these steps to locate the toner cartridge:
- Turn off the printer and disconnect the power cord.
- Open the printer’s top cover by lifting it up and tilting it backward.
- Look inside the printer to locate the toner cartridge. It is usually positioned on the left side of the printer.
Once you’ve located the toner cartridge, you can proceed with the replacement process.
Replacing the Toner Cartridge
Here’s a step-by-step guide to replacing the toner cartridge in your HP 200 printer:
- Remove the old toner cartridge from the printer. Hold the cartridge at the bottom and pull it straight out.
- Remove the new toner cartridge from its packaging. Do not touch the electrical contacts on the cartridge, as this can cause print quality issues.
- Insert the new toner cartridge into the printer. Make sure it is seated properly and that the electrical contacts are aligned with the printer’s contacts.
- Close the printer’s top cover and turn on the printer.
- Follow the on-screen instructions to align the toner cartridge. This step is important for ensuring optimal print quality.
After completing these steps, your HP 200 printer should be ready to print with the new toner cartridge.
Preventing Future Toner Cartridge Issues
Replacing toner cartridges is a routine task, but there are ways to prevent issues and extend the life of your toner cartridges:
- Keep the printer clean: Dust and debris can affect print quality and cause toner to smudge. Regularly clean the printer’s exterior and interior to maintain optimal performance.
- Use high-quality toner cartridges: Investing in high-quality toner cartridges can improve print quality and reduce the frequency of cartridge replacements.
- Store toner cartridges properly: Store toner cartridges in a cool, dry place away from direct sunlight and extreme temperatures. This will help maintain the toner’s integrity and extend its lifespan.
- Follow the printer’s maintenance schedule: Regularly perform maintenance tasks, such as cleaning the print head and aligning the toner cartridge, to keep your printer running smoothly.
By following these tips, you can ensure that your HP 200 printer continues to produce high-quality prints and that you’ll need to replace the toner cartridges less frequently.
Conclusion
Replacing toner cartridges in